Web Forms
- Home
- Web Forms
Web Forms
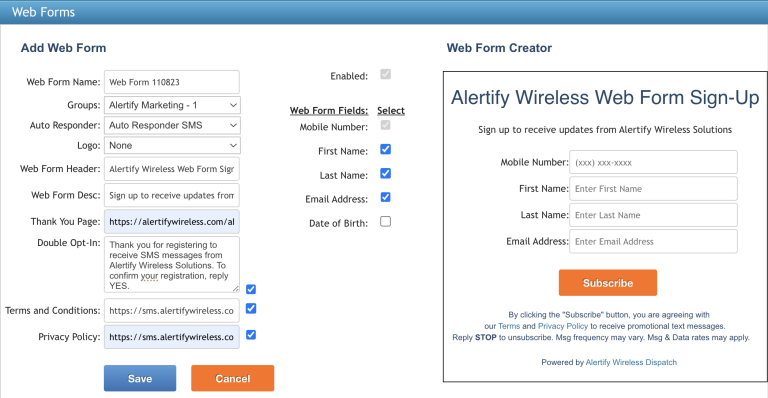
Web Forms are used to capture Contact information from your website, specifically Mobile Numbers, but also First Names, Last Names, as well as Email Addresses.
Contacts are added to the Alertify Group selected, and are sent an immediate Auto Responder message, confirming their web submission.

How to create a Web Form
To create a Web Form, go to Marketing > Web Forms.
- 1. Enter a Web Form Name.
- 2. Select the Group that new Contacts will be added to.
- 3. Select the Auto Responder that the new Contact will receive.
- 4. Select a Logo (optional)
- 5. Enter a Web Form Header to title your Web Form. (optional)
- 6. Enter a Web Form Description (optional)
- 7. Enter a Thank You Page to be redirected to, after Web Form submission.
- 8. Enable Double Opt-In (optional)
- 9. Enter a link to your Terms and Conditions.
- 10. Enter a link to your Privacy Policy.
- 11. Select the Web Form Fields you would like included on your Web Form.
- 12. The Web Form Creator will show you the Web Form, as it is being created.
- 13. Click the Save button.
- 14. Click the HTML code button, to copy the HTML code to a text file.
